Group Project
For our image construction project we had to put ourselves in groups of 5/6 and alocate roles within the group. I am working with Sophia, Katie, Rosie, Sam and Becca. Our roles within the group are:
Shoot co-odinator:
Lighting lead: Becca Smith
Building: Sam Shipton/ All
Budget controller:
Props master: Katie Joiner
casting lead: Katie Joiner
Camera Master:
Health and safety representative: Rosie Squires
Post Production lead:
Stylist: Me/ Sophia (hair and make up)
We have chosen to base our image on film noir from the 40's and 50's. We found that as a group we were interested in the status and relationships between the men and women within the films of this time. We found that there were mainly two types of female characters the idyllic 'good girl' and the powerful women that has control. As part of my research I plan to research both types of characters as they are represented very differently through there clothing and persona. I am going to look at female icons of the time like Marilyn Monroe and Audrey Hepburn but also how women were represented in pin up at the time. I hope to look further into the empowerment of women and how this was shown within films of the time. Modern interpretations of 40's and 50's fashion will be looked at and also artists and photographers that have been inspired by the theme of dominant women and also those that have looked at this time period.
Pin up
Femme Fetale
Women & War

During the war in the 40's there were media campaigns urging more than six million women into the work force. Many jobs were industrial meaning that the women were now partaking in work far more physical than expected of them before. This gave women a whole new independence as before they mostly had 'women jobs' or to stay at home. I felt that this was relevant to our research as femme fatale characters were frequently being used in films made at this time which seems relevant to how the role of women had changed in society in such a short period. This famous 'We can do it!' poster is very empowering for women as the women shown in the image holds her head up and flexes her muscles to show her strength. She wears a shirt instead of a dress and has a bandanna on to conceal her hair to show that she is ready to work. this is not the type of outfit we wish to use as we are not trying to present the story of the working women. I do however want our image to mimic the way that women are ported in this poster. We have decided that we defiantly want a powerful femme fatale character for our seen so we good to find a way of making our women appear strong and be the main focus as soon as the viewer sees our image like in this poster.
Marlene Dietrich
In the 40's and 50's it had become acceptable for women to dressing a style the way very similar to men. Marlene Dietrich takes this style to the extreme when photographed in full gentleman's attire. The way that she is seated is also very masculine. Her pose and the way that she is leant forward slightly toward the camera displays her confidence. I find this image very empowering as she seems to be putting across the point that she can dress as a man does and sit as a man sits and therefore can have equal authority. This could be an interesting twist to our classic noir image as the female character could challenge the males authority by dressing as he would.

This second image shows the actress again in masculine clothing however it is far more casual. The outfit is closer to that of which a detective of the time would have worn in the films when stripped of the traditional jacket and hat. There is no reason why we could not use role reversal within our image and have the female as the male or even use two women but it may alter our original concept of a femme fatale using her sexuality to manipulate the male.
Marilyn Monroe

Outfits & Accessories

When researching femme fatale styling it seems that they are a certain class of women. This lead me to look at vogue images from the 40's and 50's. I chose the image to the left as gloves were very fashionable at the time. Long gloves like the ones shown here were worn more for evening wear and occasions where as short gloves cutting off at the wrist were more casual. These were often either lace as a fashion statement or leather for practicality. I think that gloves are an accessory that we should use and can choose the type depending on the rest on the outfit. I also liked the dress worn in this image. I think that the actual style would be far too dressy, however I think the colour could be suitable for what we want. Red can be symbolic of danger which suits a femme fatales character as they are manipulative and seductive. Also red symbolises blood and death which would be perfect for a detective/ murder scene.
Looking at this image on the right gave me the idea that our femme fatale could wear white. It is the colour of innocence so there would be an irony to the outfit. The hat is also a main feature of this image. Hats were also a very fashionable accessory during the 40's and 50's and were frequently featured in vogue. As shown earlier this style of hat can give the women in the scene a mysterious presence just by tilting her head down slightly to hide some of her face. This image also touches upon vanity which is a likely characteristic of a femme fatale as they are beautiful and clearly aware of this as they use it to their advantage. This is something that we may wish to touch upon within our scene scene in some way.


Veils were not an accessory the I first thought of when beginning my research into 40's and 50's fashion but kept coming across them. When I think of a black veil I automatically associate it with funerals and mourning. We could incorporate this onto the story within our image scene for example a femme fatale character wanting to appear as if she is mourning her husband that she may have murdered etc. This type of story line is very plausible when looking at detective stories and film noir.
A veil could also give the character a mysterious presence that I suggested that a hat may be able to create earlier. By covering the face with black netting it can still be seen so we could experiment with facial expression etc but there would still be that element of her hiding something.
After looking at gloves, hats, veils and both red and white clothing I found this image from vogue that combines all of these. By having an outfit that is both red and white it presents the viewer with an irony that she is wearing white but is far from an innocent character but also the red shows her dangerous side. I especially like the idea of red lipstick as not only was it often worn by all women from film stars to general women but makes the mouth appear even more seductive. Even if we shoot in black and white I think that we should still use lipstick as although the colour will not be visible, the viewer will still be able to tell that it is being worn. Like I said above the hat and veil combo could work well if we are trying to give our female character an element of mystery and the gloves would give her an essence of class.
Hair

When looking at hair and make up there are various hairstyles that are classic for the 40's and 50's. Above I have looked at pin curls and finger waves. I like the small curls spayed to the head as they are very noticeable from the time however I am not sure if this style would suit our seductive character as much as the finger waves. Here are two images of veronica lake who often wore her hair in a finger wave. This hair style is also classic and although it is sculptured it is also loose over the face which creates a much more seductive look and will be far more suitable for our sexualised character.
During our tutorial we looked at many fashion images inspired by film noir and femme fatale characters. We decided from this that we wanted to our female model to be wearing lingerie with a fur coat. Below I have started looking at specific garments and accessories. I also think it would be helpful too look into rough prices and places that we might be able to source our clothes from.
Paolo Roversi
I have chosen this series of images taken by Paulo Roversi as the main inspiration for the families outfits. We have discussed having a a women in stockings, heels, lingerie and a fur coat and all of these images follow a similar style to this. All of the characters in these images are femme fatale's and prove to me that we can create this style in a way that will make the character look strong and not slutty which is what my tutor was concerned about. We had only considered a fur coat or coat with a fur collar however the group found the centre image with the trench coat interesting. I think that this would be suitable for a 1940's shoot and is very film noir however I don't think that it would be suited to the character. This is because it is what the detectives would have worn as a posed to the females and I don't want to confuse the concept by giving the impression that she is the one trying to solve the kidnapping and not the one that has committed it.
Stockings
We decided that we definitely want stockings with a garter. The legs will be on show as she will only be wearing a coat so £12 Ann Summers
Coats
Topshop £175
Hats
Gloves
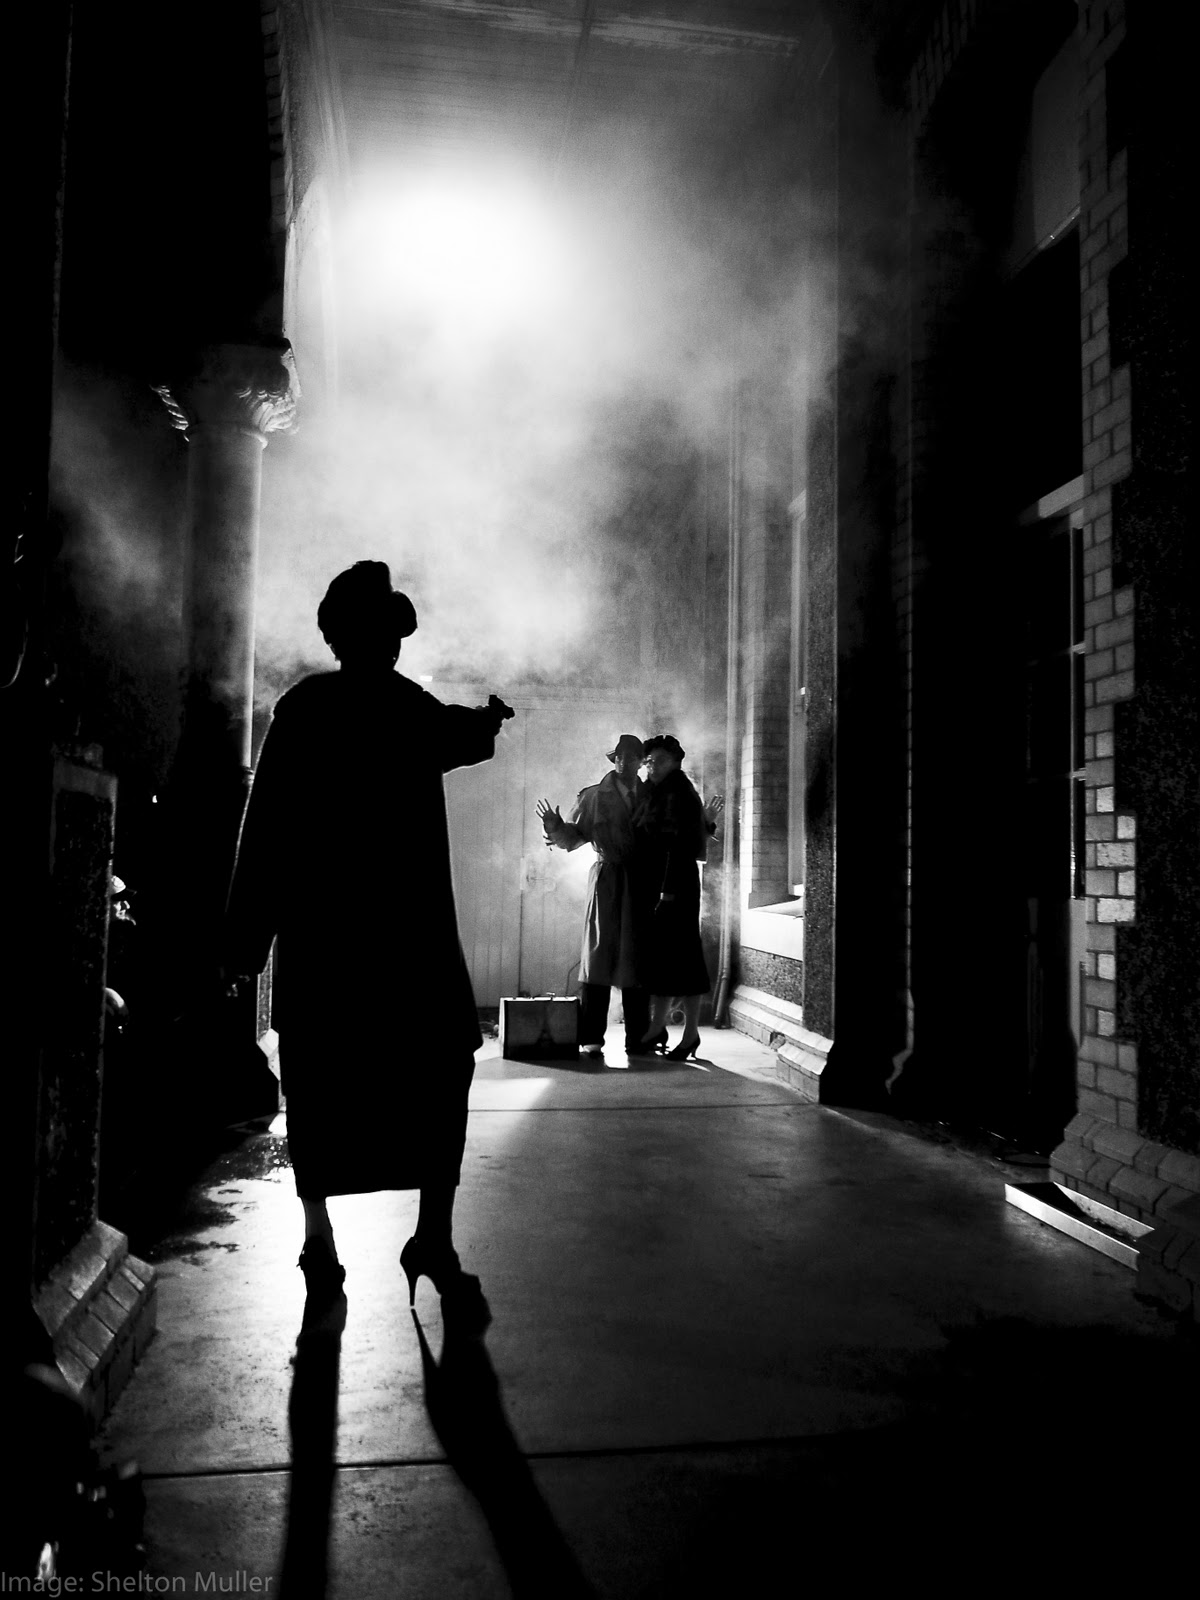
We have decided that we are defiantly going to use the man in a car boot idea for our image so we are setting our scene outside. We know that we want some sort of street scene but are unsure on details so I have found some examples that may help us below. From a set build point of view it would be easier for us to recreate a back street than it would be to create a whole street scene like the last image on this page. I think that a back street would be more suitable for our story line as well as kidnap is not something that would want to be displayed in a openly public area.
From these images we could take the idea of using brick walls and I also like the idea of the wooden double doors have been used in two of these images. Street lights or how to create the illusion of street lights are also something that we could look into. A smokey mist has been used in quite a few of these images Which help set the scene and create a mysterious atmosphere so we could see if using a smoke machine is a possibility in the studio.
We are also going to mimic these classic film noir scenes by setting our scene at night.
After our tutorial we each chose an idea and each looked int different ideas for scenes. We were most keen on the idea of having a man tied up in the boot of a car with the femme fatale character standing close by smoking or something along these lines. We decided to look at other ideas anyway just incase it is not possible to recreate a car in the studio.
I started by looking at having a man tied up in freezer. This would be a fairly modern interpretation of a film noir scene and is would be more a combination of film noir characters and a modern horror scene. I thought that we could maybe have the women opening the freezer door and looking inside at he kidnap victim. The location would probably have to be something like a basement or a utility room as it is isolated but still a room that a freezer would actually be found.
This images shows how we wish the man to be seen. He would have be be tied u and perhaps gagged or blindfolded to make the situation obvious to the viewer. We also discussed maybe having a lipstick mark lift n his cheek to show the way that the femme fetale has used her sexuality to get the man in this predicament. We also want our male character to be wearing a suit but need to decided if we want his to look as if he has just been roughed up a bit or if we want him to still appear in pristine condition.
If we did have the man in a freezer we would have to experiment with ways to make him look frozen like in the image above. The best way to do this would probably be to get our make up artist to make him extremely pale with slightly blue lips an then cover him fine ice not just on his clothing but also hair eyebrows etc.
Misfits
I found this image above from the scene in the channel 4 series misfits. This shows a character standing above the open freezing with a body in it. I chose to look at this image because of the lighting. I we chose to create a scene like this we could make it seem like all of our light is sourced from the freezer as it created a glow on the face on the person looking into it. I think that it could create a dark atmosphere and really bring the viewers attention the the face of the murderer and draw them into the emotion on the image.
Rise and Fall of Idi Amin
This image is from the film 'Rise and Fall of Idi Amin'. This is quite far from our original idea of a kidnapped man but was something i came across when looking at images of frozen people. The idea of just using a head could be quite easily done in the studio as we could just have a board or something covering the body for example if the head was inside a kitchen cupboard we could have the body standing behind the board (wall) then have a hole cut for the head to pop though. If we used this idea though I think that it would be more fitted to a twisted 50's housewife scene as it would be set in a kitchen which would then mean completely reevaluating our characters and narrative.
Whilst looking at the freezer scene it gave me the idea to also look at other kidnap type scenes we could create within a house. Below are examples of 50's bathrooms.
Here i have done two very rough mock u images of how we could create kidnap scenes in bathroom. The most obvious place to have the tied up body would be in the bath as it is the right size and shape. In the first mock up image i have the women perched on the sink and have chosen an image where her leg are cross so that her stockings will be an obvious feature to show the element of seduction.
In the second mock up below I decided to play on the idea that a bathroom in a room that a women gets ready in. By having the women touching up her make up in this scene it would show that she is in complete control of the situation and is not worried about the man that she has tied up. I love this as it really shows the characteristics and power of the female character.
After suggesting that the freezer scene could be located in a basement I thought that it could be an idea to look into further. Basements are often used in horror film and in kidnap scenes as they are underground and hidden and seperate from the conventional areas of the house. The main problem with setting our scene n a basement is that it may contradict with our female character. Is it really a place that we can see her being? They are often dingy and dirty in films and that is not the sort of place that you would expect to see a beautiful women in heels and a fur coat.

Here is a quick mock up of how a basement scene could be set our with the male character tied to a chair and female in a strong a confident pose by the stair case.
.Exactly what lighting we want to use
.The width of the ally way
.If we want street detail/ door ways
.Where we want the shadows
.Height of the smoke from the Smoke machine
.What we are tying the man up with
.Could have the light close to the wall to and shoot downwards to create shadowing on the floor and accentuate texture
.Dont have to get stuck with the idea of reality and creating a set that is realistic (trying to create drama)
.Look at Pinewood studio for brick walls
.Making the camera the third person in the scene so taking the photo from around a corner etc so the the audience would appear to be a character looking upon what is happening. This was suggested as it could add drama and tension however probably wouldn't work for us as we are only making the back end of the car.
.The story line of the male/ is he wounded /dead
.When the tutor said about not getting stuck in the idea of reality it made me think back to the film 'Inglorious Bastards'. There is a scene when a character walks out of the room and it is shot from above the set so you can see the tops of the boards used to make the walls. It made e think that if we do have difficult with the car seeing as we are only making the boot we could maybe consider making it a style within our image to show that it is actually a set. This is not what we are currently wanting to do but is something that i could suggest if we come to a dead end when making the car.
.After looking at the model that Sam made me and Sophia questioned the size of the ally compared to the car. The car is a lot bigger than i thought as it is two meters and this is a large car so we may need a larger alley. Talking about this lead us to discussing what able we wanted the street at. As a group we have already said that we want to take the photo face onto the street which can't be changed now because the able we take the image affects how much of the car is made. Becca suggested having the street angling in slightly to create the illusion of it becoming more norrow. I am not sure with angle would make the street look the best but I also felt that it would look better with the wall angled in some way. Sam and rosie did not like this idea so we decided that it would be something that we would have to experiment with next week when we are deciding on camera lens.
.We then discussed street detailing. Sophia, becca and myself thought that it would look better if we had a bit of detail on the walls of the ally way for example a dip in the wall where we would hang black velvet to create the illusion of a doorway or something similar. Rosie and Sam were insistent that they thought this was pointless and that the walls were not an important feature and that we should focus on the car. This became quite a debate but eventually we came to the conclusion that with out dark lighting and shadows not much of the wall would be visible anyway so the detail would be lost.
.Flooring was something that would had pretty much already decided on. We knew that we wanted to mimic the floor in the image below. It was suggested that we use canvas for our flooring and then paint it. Rosie remembered that another group are using canvas for their ceiling and it is cheaper to buy in bulk so to save money she is going to ask them if they would like to do a joint order. The floor shown below has a shine to it which came us and becca suggested painting over the grey painted canvas with varnish to create this wet look/ shine but Rosie and Sam felt strongly that it would not look realistic as a floor which we all eventually agreed on.

.We have found a smoke machine that would only cost us £5 each which is very reasonable for the week. Rosie found out that we are allowed to use the smoke machine depending on which smoke is used and we also had to decide if we wanted a machine that released the smoke upwards or along the ground. We wanted to achieve a look with the smoke similar to that of the one above as we think it will be very dramatic and resemble film noir but also the fact that we can't just cut off the back of our street so the smoke would create the illusion that there could still more of the street behind it.
.After talking about the smoke we had to think about what we wanted to put behind it. Did we want another brick wall or need boards? Becca made the point that it wold be visible because of the smoke so to save money and resources we could simply just use the large black backdrops supplied by the uni.
.Lighting was something that the group have thought a lot about but had not come to a conclusion on yet. from our workshop we looked at blue lighting on the actual model and having 2 light in the background like street lights. We are going to have to block off the blue lighting with shutters so that it only falls upon the model because too much lighting will reveal the fakeness of the car and its lack of wheels. We have drawn up a rough plan of lighting but Becca needs to talk to our tutor and make a final plan so that we can test it and see how suitable it will be.
. The tutor that e had our worksop strong suggested that we consider making the image black and white. We thought that having it in colour would give it a modern twist but then during our group meeting started to change our minds. The image would be a lot more classic film noir if we did it in black and white and would also make it easier for us to work with dramatic shadows. We decided as a group we would now defiantly make the image black and white so there for would not need the blue lighting on the model.
.As we had decided to change the image to black and white sam then made the point that we had planned to make the car black. This would make the car harder to see so we thought that we should paint it a lighter colour such as red. This however is not our final choice of colour and we shall seek advice from the men helping us to make the car and our tutor.
.We need to source rope to tie the man up with and Rosie remembered that she had seen some thick rope at work that they no longer used so is going to ask and see if they would let her have them. This would mean not having to shop around or pay for the rope saving us time and money so we are currently waiting to see what they say.
.The tutor asked up if we were having wounds on the man or if there were any weapons on the scene. We had already decided that the idea is that she had used her sexuality as her weapon so we did not want to display any actual weapons. Sophia suggested wounds as it is unrealistic that she would have got him in the boot without harming him in some way but we stuck with our idea of having just a lipstick mark on his cheek instead of wounds. Our story is very much about the femme fatale character and more about sexual manipulation that about action and violence.
.I have found a stylist but still need to find a make up artist and hairdresser so this is something that i must go away and sort out by next wednesday.
Underwear sets
Here I was looking at underwear set. This is the type of clothing that we had discussed the women wearing however the group are open to other ideas. The image on the right is the type of outfit that we are thinking of with the stockings and the fur coat however the underwear is more modern. We could chose this type on underwear if we justify it by giving the film noir style shoot a modern twist. This however could be seen as just laziness as it may look as if we had not bothered to find under more suited to the 40's/ 50's like the underwear on the left. I think the we should probably choose an high waisted underwear set like this one as it is what was worn at the time and will make the model look less 'tarty' as less flesh will be on show. This was not a concern of mine however it was something that the tutor was worried about as we want to create a strong powerful women and not a slutty type character.
Corsets could also be suitable for our shoot. We suggested to our tutor that a corset would be a better option if the model that we find would feel more comfortable without their stomach on show. He made the very valid pint that we should find a model that works around us and not the other way round so if they are not willing to wear what we ask then we should find another model. I do however thing that the cosets look good with the stockings and suspenders so won't discard the idea entirely.

Covered Up
I was thinking about what the tutor said about making sure that the model did not look too tarty so i considered options that would cover up the body more. on the left a tight dress has been worn to accentuate the females curves and would have been the type of dress worn at that time however this is quite far from our original idea. I like the image on the left as a long coat has been used. I think that this would be the best idea for our shoot as it covers however will still be left open so that the underwear can be seen.
Lighting Workshop

During this lighting workshop we looked at controlling lighting in a film noir style by creating narrow strips of light. we felt this this would look mysterious and was inspired by the lighting crated by blinds in film noir office scenes. We liked the face the this created deep shadows and experimented by revealing different amounts of the face. By showing just the eyes in the lower left hand picture it creates suspicion however none of the rest of the face can bee seen. We liked this idea however would have to try using more lighting so that more of the figure can be seen in dim lighting but the main pool of light still being on the face.


Here we angled a light down over the top one the board at the back. This was done to create the illusion of street lighting. We liked the idea of creating a street light however the group did not like the harsh contrast between the dark and light on the wall so we would have to play around to create a similar effect but maybe with softer lighting or incorporating other lights.
We put a blue filter over the lighting to create a moonlight effect. This however is an idea that we are likely not to use as we may just take the photos in black and white.
Mans styling
I was looking at the type of hats that were worn by the men in film noir. This particular type of hat was the most common and could be used in our shoot depending on the positioning of the male character. If the man is in the boot has his head laid down then it would be highly impractical for him to be wearing a hat as it would not sit right on the head and also some of the face may be covered. This would loose the facial expression which is important to the image. This could be resolved by having his neck stained upwards as if he is trying to escape and is struggling. I am unsure if this is an accessory that we will be using as we may decide that we would prefer to focus on the hair and have a more slick look like the one shown below.

A noticeable feature of 1940's suits is the size of the lapels. This can be seen in both the suit above and below. The lapels are a lot larger that those found on more modern suits so this is going to be a key element that we shall have to look for when finding the male characters outfit. The best course of action may be to look for suits in vintage stores as it may be difficult to find a suit specific to this type in a modern day suit hire store. We could however decided to go with a modern suit and modernise the outfits as we may feel that it is more suited to the 'Fashion' image brief.
I found this image of a grey suit with large lapels. I think that grey would be the most ideal colour of the suit as it will we in in front of a black background and the set will be quite shadowed due to our film noir theme. By using grey it is less likely to wash out into the background but it is also a colour that could was worn in the 1940's which can be seen in the second image above.
Emma's coats
I went to see a third yeah about her collection of faux fur coats that she had made for her final collection. Her designs we extravagant and eccentric which I felt would be perfect for a fashion shoot. We were looking for a large coat to wear with our selected underwear and I chose two of her coats to look at which are shown below but she also had a collection of faux fur shawls which I bought could also be worth considering.
Coat 1

The colours of both the green and blue coat would not be suitable for a film noir style shoot if we were planning to shoot in colour but this will not be an issue if we are photographing in black and white. On the green coat above Emma has made a late collar that can be worn down or up almost like a hood. This could give us a variety of shots and positions. I also like the way that both coats drape slightly on the ground. our model will be shorter that the one modelling in these images so the coat will drape more which i think, if trailed or fanned out, could prove to be an elegant and powerful feature.
Coat 2

Shawl 1
Although we had decided on using a fur coat I looked at Emma's collection of shawls. They are quite thick and there fore could till cover some of the body. The fact the the model would be holding the shawl and could manipulate it around the shape of her body and control what parts are covered or exposed could prove to beneficial when directing poses. There however is the concur that they could be too exposing as they only really cover the upper body but they could bring an element of femininity and class to the styling.
Shawl 2
The group were quite happy to do a trial shoot with the coats but decided that the shawls were not as suitable as they did not cover as much of the body. Emma was quite happy to let us use one of the coats for our final shoot however there was an issue with dates. Emma's hand in date collided with the dates of our shoot so they would be away being marked at the time that we would need them. This meant that using these coats was no longer an option.
Lighting / set workshop
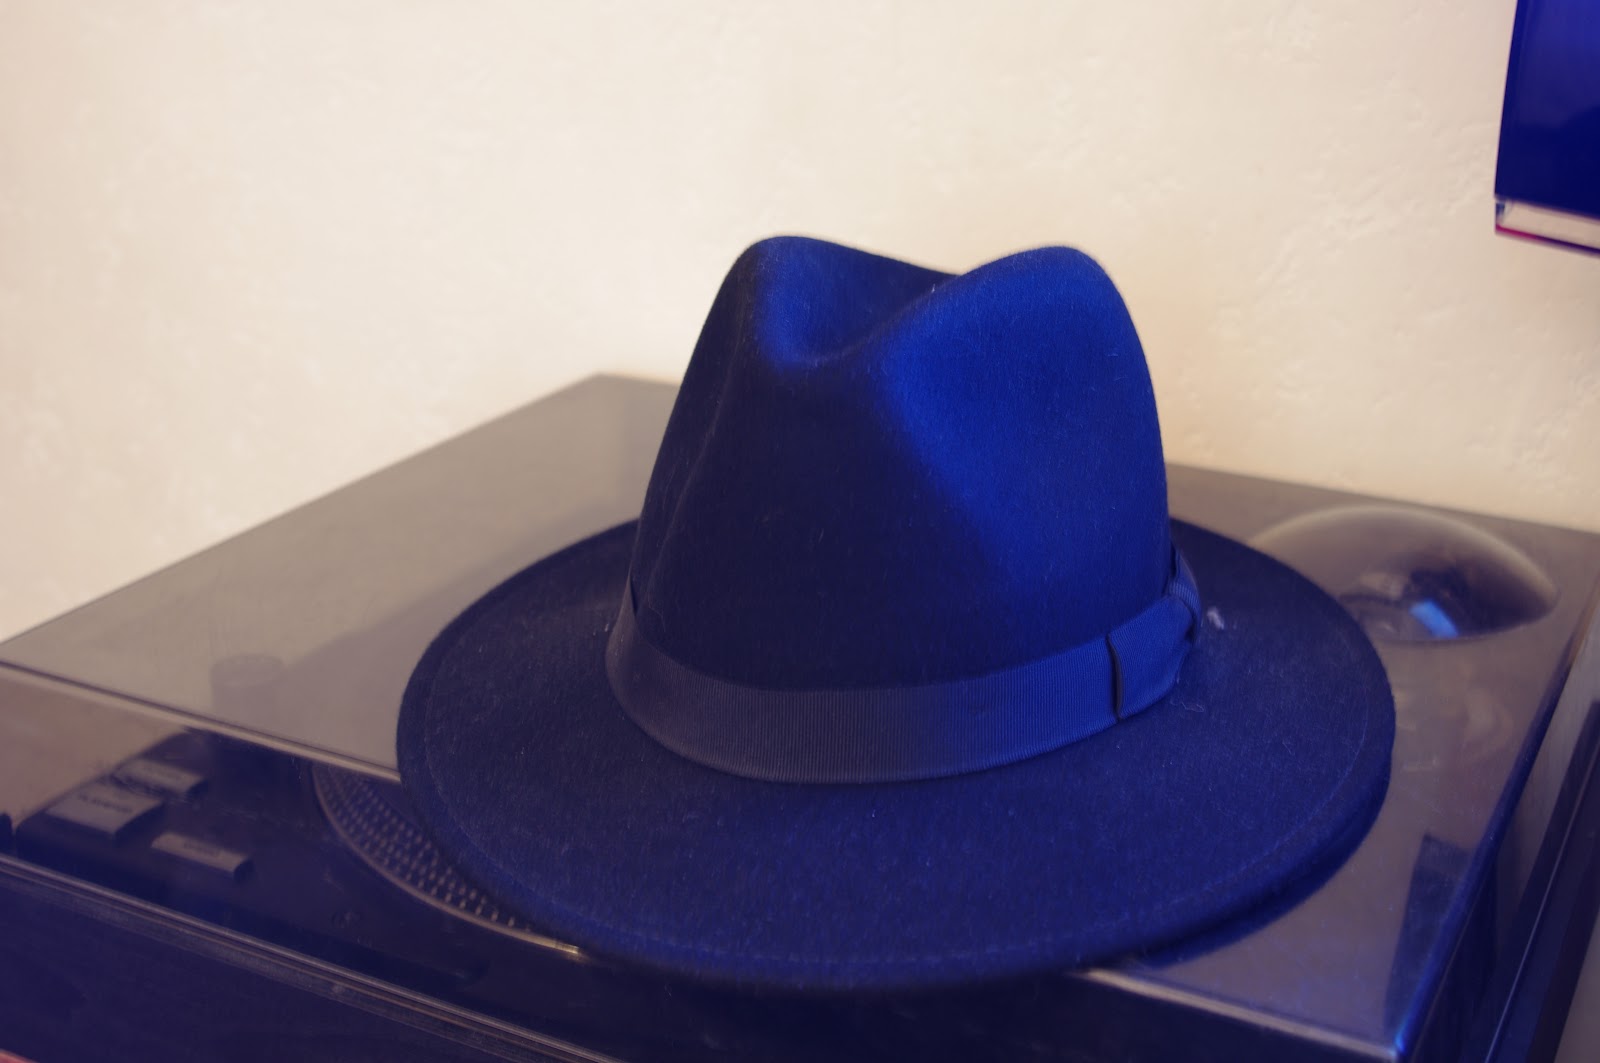
We started the Workshop by measuring out the 2m car using a table and two chairs. The height has been marked by the stand with the hat on. We set up 3 polly boards on each side. We took these two images below from a two different distances. but were still unsure about the composition of the image and if we needed both walls to be seen in the images.
As a group we decided that we only needed one wall in the image and have take the shot over more to the right. We stood colin against the wall to experiment with deep shadows like that ones that are created in film noir films. This gave us the idea to have some sort of pillars or protruding areas of wall or door frames etc to create detailing and shadows.
To make the set more realistic so that we had a better idea of what would be lit or in shadow we propped another table up to act as the boot and blocked the underneath of the table on the floor as this will be a solid area. We used 3 sheets of filter paper over the back lighting in this image as it was far too bright for our night time scene.
We wanted to try and take the image with a figure in the boot as it would be in our shoot. After taking this photo we knew that we would need another 300 Arri light directed onto the man as he we in the shadows. We also looked at the positioning of the two models as we did not want the male model to be too covered by the female. We were happy with this composition.
This was the first image that we took with a light on the male character was far too bright. the light needed to be controlled using two shutters so that only a small pool of light is created that lights the male up but not the whole area around him. this is what we have done below.
This was the lighting that we liked the best and as the closest to what we wished to achieve in our final images. We have used a 1k Arri light at the back covered by 3 filters to light the set. We have then used two 300 Arri lights at the front of the set. One is to the right and has lit up the female character but has been done so that she is still shadowed on the right. There is also a pool of light on the male in the boot. Pools of light are often used in film noir so we felt this we very in keeping with the theme.
Stylist (Alex Neil)
Make up artist (Laura)
Hair Stylist ( )
Final Male Models
These are photos taken by Becca and styled by our stylist, Alex. His hair has been slicked over in a 1940's style and we have put a blazer on him to get the general idea of how he suits the smart look. By wearing a t-shit it has made the outfit more modern but his was not intentional so I'm not sure if this is an idea that we would wish to explore of not.
The model also has stretchers in his ears which would be visible so we would have to get the model to take these out and find a way of disguising the holes that will be left as they can be seen when light is shining through them.
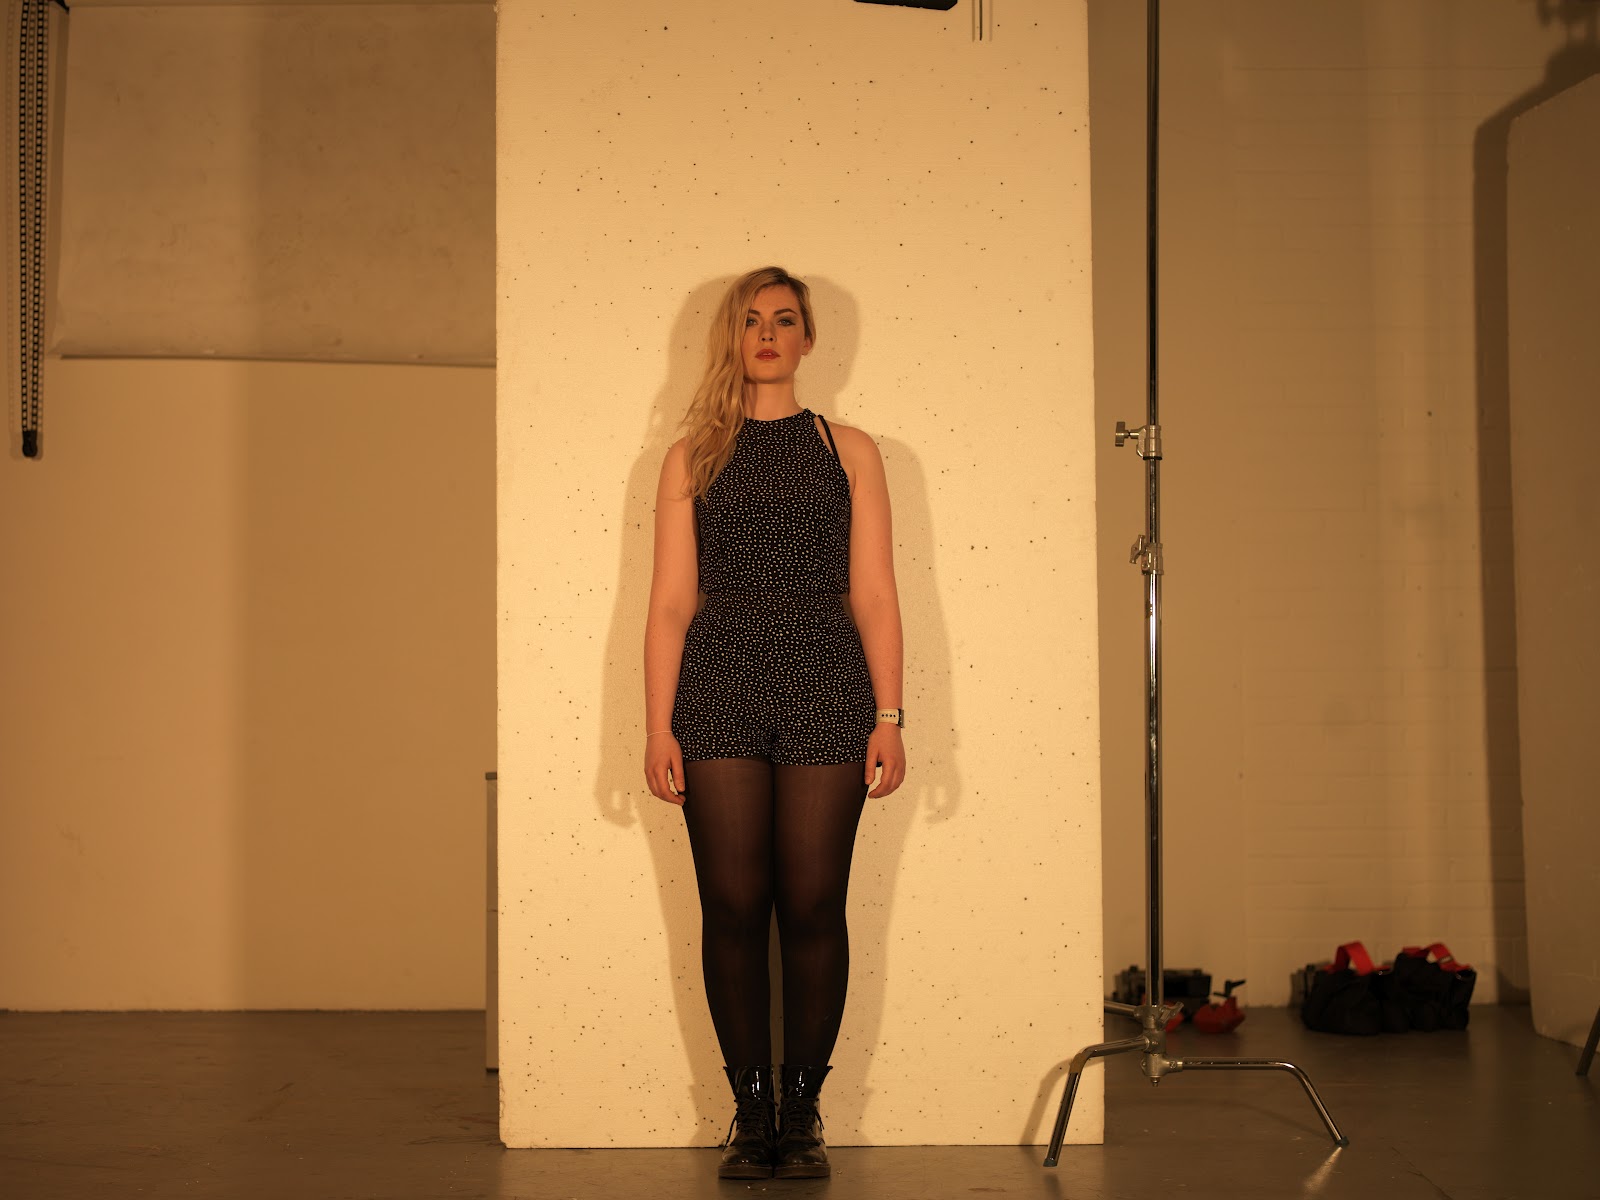
Final Female model
We have chosen Jennie Douglas to be our female Model. We were looking for a girl with strong facial features that was blonde and certainly felt that Jennie fit this description. She was also very confident in front of the camera and had a certain presence on set. We had her curl her hair slightly and wear red lipstick for the casting shoot so that we could see if this was a style that suited her which we felt it did.
Jennie is quite curvaceous but still small in the body. This could be seen as an issue for a regular fashion shoot however I felt that this figure was very suited for the time and reminded me of marylyn monroe but thinner. As we are trying to a character who's power is her sexuality a figure with slight curves was perfect.
Sizing:
-Height: 5ft5
-Size 10 on top
-Size 12 on bottom
-34b
-Large in tights
-size 6 shoes
Change in idea
We had a meeting with the tutor and we were advised to no longer peruse the idea of making a car as there was a worry that the car would not look realistic. This meant that we had to come come up with a new idea quickly. We wanted to keep the same context and the same idea of the women being powerful and dominating with her sexuality so we had to adapt the idea but in a way that wouldn't change this.
It was suggested that we should have the male character actually dead in the ally way but amongst rubbish . This meant that our focus was now on the detailing of the street. It was decided that we were only going to have the males legs showing as they would be sticking out of the ally way. This adapted the outfit as we would not longer need hair and make up done or a full suit.
Final set workshop
This is an example of the basics of the final set. we no longer had to cater the set to the size of the car so the width has changed. After the making of this mock up it was decided that we were only going to have the left wall featured in the image. This was concluded when we were experimenting with camera angle as we discovered that it was not necessary to have both parallel walls to create the illusion of an alley way. This meant that we would be saving of resources as we would now need half the amount of wall moulds which we found to be our biggest expense.
Final female outfit

We decided on this as our final underwear choice. We had been looking at sets of underwear but as a group we eventually decided to act upon the advice of our tutors and have less of the body showing. This corset type dress cost us £35 from AnneSummers. I felt that the cream panel on the front would be slimming for our model which is important from a fashion point of view as we have deliberately chosen a model that is curvaceous as a symbol of sexuality but still need to create a look that will flatter her the figure. The model is a size 10 on top but a 12 on the bottom so I chose a size 12 overall as we could easily use chicken fillets to pad out the chest area on the day of the shoot. The black panels on the side are made of a see through mesh type material which I felt added to the sex appeal but without actually showing bare flesh however there is a slight issue as there will be a line where the underwear will be and the dress is very short so it would be unacceptable to ask the model to not wear underwear. I am going to purchase a control skirt or control pants that are high waisted for the model to wear under the corset dress as it will not only give the models figure a clean finish, but will also prevent the outfit from appearing too risqué.

Hair
We chose the finger wave as our hair style. These were the two images that we gave to the hair stylist. We specified that we wanted the hair to not be tucked under like at the back like the image above but to have the same tightness in the curls. I wanted the curls to flow down as seen in the image below as I felt that that would be more seductive. I was also given the option of having the curls falling in front or behind the ear. Behind the ear would appear a lot less attractive so we had it falling across the face slightly. This also adds a slightly mysterious element which is suited to the Femme Fatale character.
Make up
We asked out make up artist Laura to recreate a look similar to that shown in the vogue image above. We definitely wanted red lips and liked the idea of having smokey eyes. The image above also has eye liner flicks so we gave these as general guidelines but said that she could experiment and expand on his idea.
Fitting


We had a fitting with our model to make sure that the clothing as shoes that we had bought fitted and to see if there were any changes that we wanted to make to the outfit. The coat and corset dress fit well, however I am going to buy chicken fillets to put in the cups of the corset because although she does fill them I feel that we should accentuate her curves slightly. In these images she was wearing her black tights as we has not yet purchased the stockings for her to try on. After looking at these photos Rosie became concerned that black stockings may get lost on the coat and in our black background. We all agreed that this could be a problem so we considered maybe using skin colour stockings. I showed these to the group and managed to convince them that this was not a good idea as the skin colour stocking have what I consider to be a highly unattractive tan colour strip at the top. We decided instead to find stockings that were black but with a low denier because they would not appear as dark as the black tights shown above, but would still be sexy. Below are the stockings that we decided on. They are from AnneSummers and cost £8.oo.


These are the final shoes that we chose for our model as we decided that a modern interpretation of a 1940's shoe would be better than using an actual vintage shoe with heels that were going to be a lot smaller and less flattering to our model. I felt that this was the right choice as we had to take into consideration that the shoot was not only based on our narrative, but was also a fashion shoot. Peep toe was a feature that was highly fashionable in the 40's so we wanted to keep this traditional element when searching for a modern shoe. I was looking for a stiletto heel as a posed to a wedge heel as they are a lot more elegant and feminine but also wedge heels are too modern.
Mans Shoes and Trousers
The change of set has meant that we no longer need the male character to be wearing a full suit so we would only need to buy trousers, shoes and socks. when researching 1940's shoes I found brogues to be quite common and they are also smart which is crucial to our shoot as the character is meant to be a wealthy man that the femme fatale character is taking money from. I think that we should find ones that are plain black because I think that they look smarter and would look better with grey trousers than the black and white style below.
Final shoes
These are the shoes that we chose. They were £25.00 from Matalan.
SET BUILD
We started by testing the lighting on the wall mouldings that we had ordered. We did this by standing them up against the walls and experimenting with the placement of the light to create deep shadows.
We did this again after we had painted the walls as seen below as we needed to know how the light would respond to the walls once they had been painted darker as the reflection would be different.
We painted the walls a light grey/ cream colour and rolled over the textured areas with a brick colour. At first we were going to paint the walls different shades of back,white and grey as the shoot was in black and white. We changed this die as we were advised to create the set in the most realistic way that we could in colour and that this would have the best outcome when it came to lighting.
The painted sheets of walls were stapled to the 12ft boards.
Here is our test shoot once we had built the set. We had to experiment with lighting on both the sweet, male and female model.
The smoke was also a feature that we needed to practise with. In the image above the smoke is in an isolated section and below the smoke had dispersed too much and had began to cover the model which would not be acceptable in our final shoot. We learned to control the smoke by directing the smoke machine and allowing it a few minutes to settle and also fanning it between shots which directed the smoke and made it thinner.
Photos for make up artist
-Eyebrow shaping and eye shadowing
-Eyebrows and eye shading, liner
-Eye flicks, lips, blush
-Eye shadow, liner
Models Hair and Make up
This is the model just after having her final hair and make up done. We had the finger wear hairstyle done by a local hairdressers costing a total of £25.

Laura used purple lip gloss in the centre of the lips. This difference in colouring would not be visible as the image would be taken in black and white but added shading to the inner lip to make it appear more round and add depth. She darkened the eyebrows and created a more defined shape. The make had to be done in a way that was slightly more than it would have been if were were doing a close up shoot as not only would the model be standing quite a distance away from the camera but the image would be in black and white. She included the flicks that we wanted and used fake eyelashes to accentuate the eyes. The sharp shapes featured in the eyebrows and eyes are reflective of the strength of the femme fatale character. She used pinks and whites to create a shadowed effect on the eyes that graduates into the flicks. Below is an image of the make up as it would be seen in black and white.
Poses for shoot
Shoot
Final Image
Final Edited Image
Pricing list done by sam